In this tutorials, I will explain to you how to add Gallery in Appointment theme. The native WordPress image gallery displays as a grid of image thumbnails. If you want to show overlay effects on the gallery images? You need to install Jetpack plugin, Using Jetpack you can create four types of gallery style like Tiled Mosaic, Square Tiles, Circles and Tiled Columns. Well styled Jetpack gallery in this theme like an overlay effect. Carousel feature is ready in Jetpack, Simply you can activate Carousel from Jetpack settings. Refer attach a screenshot.
1. Install Jetpack Plugin.
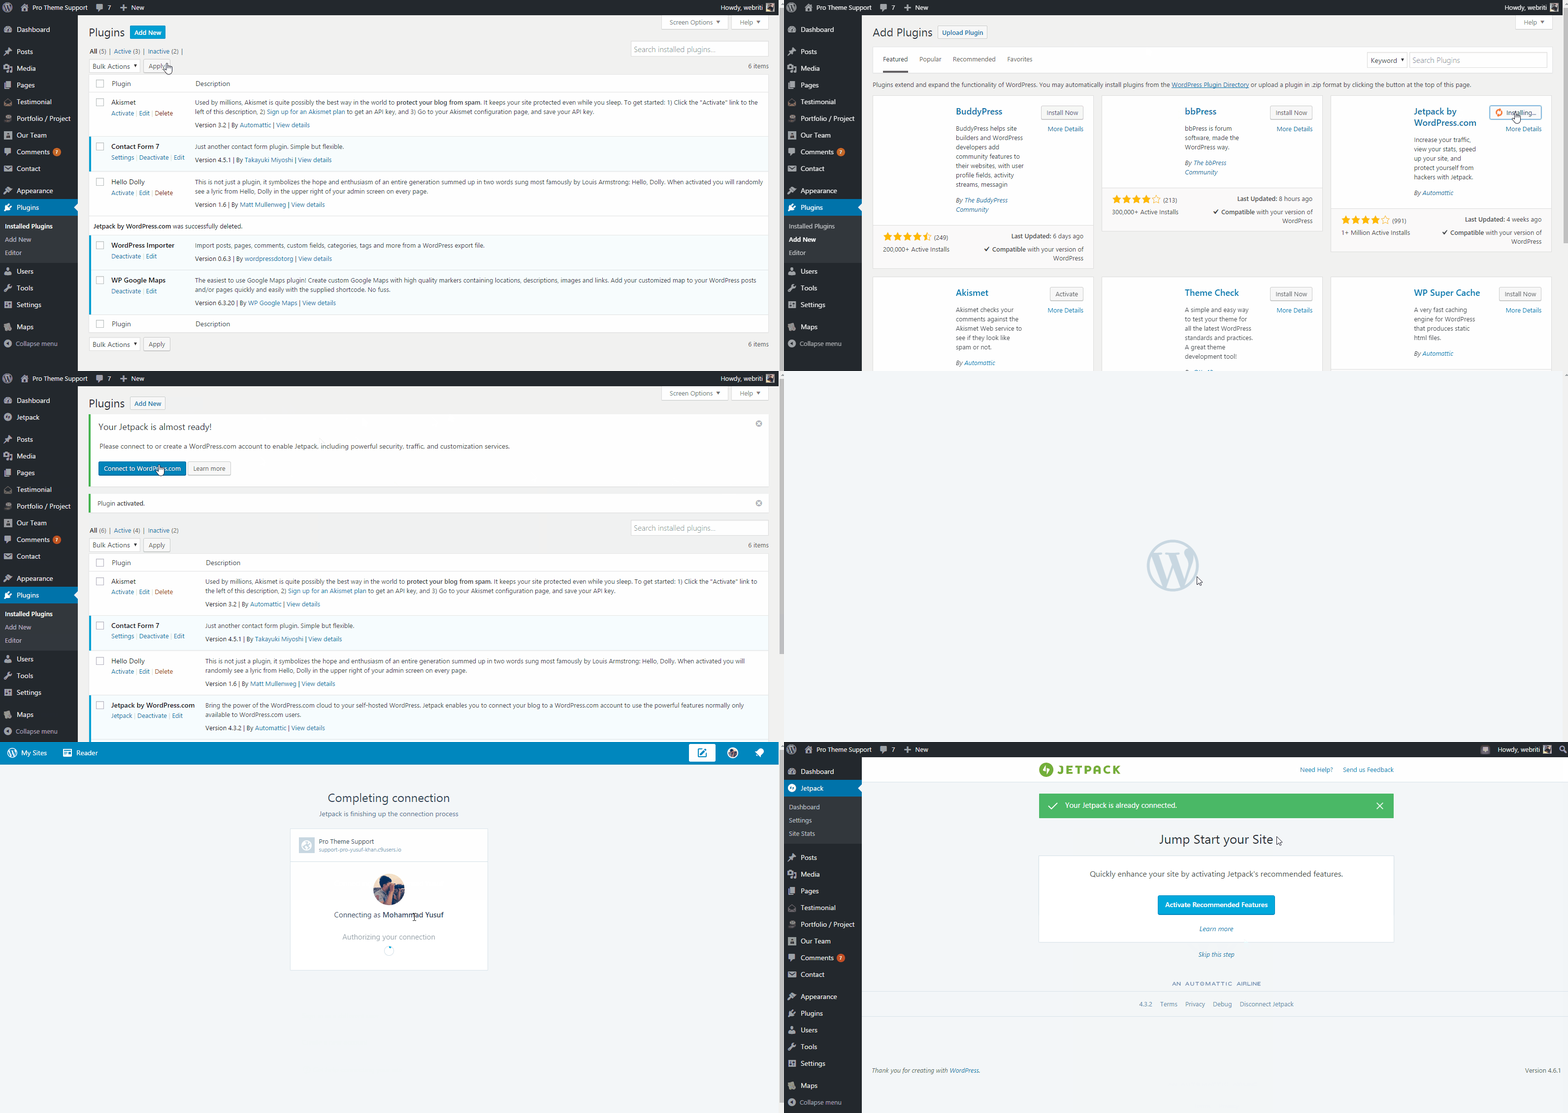
Firstly, You need to do install Jetpack plugin because this plugin allows you to display different gallery style. Refer attach a screenshot. How to install a Plugin? Click Here
2. Activate Tiled Gallery.
Goto => WP-Menu => Jetpack => Settings =>
Here you can find many tabs but you need to click on Appearance tab. You need to activate Tiled Gallery. Refer attach the screenshot.
3. Setup Media Setting.
Goto => WP-Menu => Settings => Media =>
Here you can see tiled gallery setting by the name “Display all your gallery pictures in a cool mosaic“. You need to check this setting. Refer attach a screenshot.
4. Creating a Gallery Page.
Go to => WP-Menu => Pages => Add New =>
Create a page by the name of “Gallery” then click on Add Media button to creating the gallery in the page editor. How to create a gallery? Refer attach a screenshot.
5. How to Change Gallery Type?
Go to => WP-Menu => Pages => Edit Your Gallery Page => Edit Gallery
Here you can change your gallery Type. There is four type of Gallery provides you Jetpack. Refer attach the screen shot.
- Tiled Mosaic
- Square Tiles
- Circles
- Tiled Columns
6. How to Activate Carousel Effect on Gallery?
Goto => WP-Menu => Jetpack => Settings =>
Here you can find many tabs but you need to click on Appearance tab. You need to activate Carousel. Refer attach a screenshot.


